Saturday, 28 December 2019

My last Christmas card of 2019

Hello,
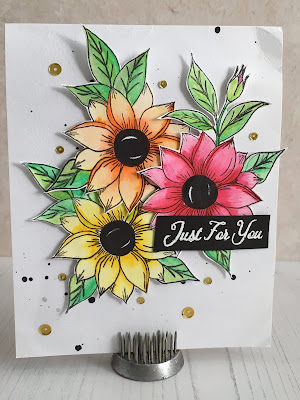
This is the last Christmas card I have made this year and it is for my daughter. I am not seeing her until next week and am giving her some money so thought I would make a card to put it in. I have been wanting to enter the Day of the month card club #10 Poinsettia Day but I didn't think I had a poinsettia stamp, but then I realised that I have recently bought the Creative Expressions Poinsettia frame die. When I bought it I just thought it was depicting daisies!

I have also been wanting to get my alcohol inks out as it is ages since I last used them. I have made a bright and cheery card with alcohol pearl inks and a very sparkly glitter paper.


I tried to get the shine to show more on this picture without much success.


I realise this is my first post since 2nd December and although this is the last Christmas card I have made this year I have only shared a few of the cards I have made. Perhaps if I get a chance I will put some of them in a post.

Unser Logo zum Mitnehmen! / Our logo to take away!
Thank you for taking the time to visit my blog today, I really appreciate it.
Hilary
xx

Monday, 2 December 2019

November Card Chain Challenge Reveal

Hello, 

It is reveal day for the November card chain challenge. I used the colour and the layout prompts for my card.


Here is my card:

You will have to take my word for the fact that the silver panel has a gorgeous sparkle to it as it doesn't really show in the photo. The flowers are layered diecuts  that I held together with eyelets and filled with enamel accents. I heat embossed the sentiment in silver but in retrospect I wish I had used white as it looks a little dull, but maybe that is just reflecting the very dull grey weather we have been having recently.


This card has been sent to Suze in New Zealand.

I was lucky enough to receive this gorgeous card from Tina in Slovenia:


Thank you for taking the time to visit my blog today, I really appreciate it.
Hilary
xx

Sunday, 1 December 2019

Black/white/red

Hello,
Do you ever have days when what you really want and need to do just doesn't happen but something that isn't a priority comes along and distracts you? This has happened to me today with CAS on Friday #169. When I saw the challenge was for black, white and one other colour, I immediately had an idea that uses a new die that I just bought from Crafters Companion. I couldn't resist as it was such a bargain.


This die is actually a cover plate and it is A6 which is a bonus for me as I generally make A6 cards and most cover plates seem to be A2. I have to admit that it did take a fair bit of practice to get the hang of cutting it. I eventually did it on my Gemini Junior with the metal plate and some greaseproof paper and running it through about 3 times. Once it was cut it is a fiddle to remove all the pieces as there are so many. While I was doing this I had the idea for this card. I cut 2 rows from the die, saved the teardrop pieces and coloured them with an alcohol marker and mounted it on black paper. For a seemingly very simple card it actually took a fair while to make. This means that I didn't get done what I should have, but at least I am quite pleased with the result. I also stacked the diecuts to give a bit more definition.


I am also going to share this at Day of the month card club, look for circles. I think I am just in time to catch it before it closes.

Thank you for taking the time to visit my blog today, I really appreciate it. Hilary xx

Saturday, 16 November 2019

Monoprint

Hello,
I have a favourite metal stencil from Sweet Poppy Stencils that I managed to put a kink in so that it didn't work so well. I was lamenting this when I had a little light bulb moment and ran it through my diecut machine and it worked! I got rid of the kink but I did gain a bow. However I could work with that.

I have discovered that metal stencils are really good for doing mono prints. I think it is because they tend to be a little thicker than ordinary stencils so the ink stays in place better when you make the print. That's how it seems to me anyway. I have also realised that the best paper for a clean print is mixed media paper.

I have made 2 cards, here is the first:


For this one I used distress inks to create the background using a torn paper mask for the ground. I dabbed distress ink in various colours directly onto the stencil and then placed it on the background. To ensure the card stayed CAS I used a stitched rectangle die to cut a section which I then mounted on craft foam. The sentiment is from Uniko which I heat embossed on the card base.


I am sharing this card at CAS Stencil November Challenge where the technique is mono print and at Simply Less is More #408 torn it.


I actually made my second card first and went on to make the above card because I thought the print needed a background and I couldn't think what to do with this print at first. Eventually I decided to diecut and insert it in the card front. These little sentiments from Uniko are brilliant for placing in little gaps. I heat embossed it in gold and cut a few little hearts as a finishing touch.


I am sharing this one at Pixies snippets playground #365 as the card for the little hearts has come from my scrap box.

Snippets Playground Badge

I still have a piece of the panel from the first card so it might turn up again sometime in the future.

Thank you for taking the time to visit my blog today, I really appreciate it.
Hilary
xx

A poorly eye

Hello,
My grand daughter who is 4, recently had an operation on her eye so I made her a card:


The little dog stamp is by AAL & Create, I picked it because of his wonky eyes. I sponged some distress ink through a stencil (also by AAL & Create) for the background and just simply coloured him with some markers. The sentiment is from the same stamp set, I heat embossed it in white. The base card is Hunkydory adorable scorable.

She lives a long way from me so I couldn't give her a hug directly.

I am sharing him at AAA cards CAS game 153 - one image


Thank you for taking the time to visit my blog today, I really appreciate it.
Hilary
xx

Friday, 15 November 2019

Nov Cas Mix-up

Hello,
It seems like a while since I made this card for Nov CAS mix-up challenge, but it can't be that long as the challenge still has 10 days to run. Anyway I am not that happy with it and thought I might make another but time has got the better of me and I know I won't get round to that so I thought I should stop being so self critical and post it anyway.

The theme is oxidised metal so I watched all the videos linked on the blog and came up with this:


I started by embossing a piece of red foiled card with a paisley embossing folder (my choice of technique) and then used silver and gold embossing powder to create the metallic look finishing with some StazOn on black ink. I then embossed a piece of white card and lined up the pattern with the strip of red shiny card. I finished it with a stamped and heat embossed sentiment on vellum.


I am not sure that my metallic effect is particularly effective, but never mind. I also hope that the embossing on the white panel doesn't stop it from being CAS. Please feel free to disregard my entry if it does.

It has been very dark here recently with the shorter days and lots of grey rainy skies so I am afraid my photos have suffered from the lack of light.


Thank you for taking the time to visit my blog today, I really appreciate it. 
Hilary 
xx

Birthdays & Fireworks

Hello,
The other day I found myself needing a birthday card for a friend who was about to celebrate her 80th birthday (I can't quite believe it) so I wanted something special, but inspiration was somewhat lacking. Her birthday happens to fall on 5th Nov, fireworks night, so I wondered if I could somehow bring in a feel of fireworks being let off. Being 80 is well worth a celebration so I thought fireworks would be appropriate. Plus maybe when that number comes round it is not something we want to shout too loudly about so I decided to camouflage the number a little.

Here is the card I eventually came up with:

I used my favourite turnabout stamp and Catherine Pooler inks for the floral circle which I then masked and used a Funky Fossil stencil to do the background. The numbers were die cut using balloon number dies from the circle and then propped up with craft foam. The sentiment was stamped and then heat embossed with clear embossing powder.

Here is a close up:

I know they say that Catherine Poler inks stay wet long enough for them to be used with embossing powder, but it hasn't worked for me yet. Each time I have tried it I have had to repeat stamp with versamark.

I am quite pleased with the end result and I think the recipient enjoyed it as well.

I am sharing this at:
AAA Birthday #7 - include a number
Watercooler Wednesday - All about occasions

Blog Badge

Thank you for taking the time to visit my blog today, I really appreciate it.
Hilary
xx

Sunday, 3 November 2019

A Little Colouring

Hello,
Today I have a very quick spur of the moment card that I have just made following a visit to Robyn at Waterlily cards. Her sweet little coloured flower in a glass vase inspired me to create this:

The succulent and pot were stamped in pale distress inks and coloured with polychromes. The sentiment is by Uniko, I stamped it in black and then heat embossed it with clear embossing powder.

I have been struggling to focus on anything today so was happy to be distracted while I made and posted this.

I am sharing it at AAA Cards CAS game #152 Maxi White Space.


Thank you for taking the time to visit my blog today, I really appreciate it.
Hilary
xx

Saturday, 2 November 2019

October Card Chain Challenge

Hello,
Today is reveal day at Card Chain Challenge, this month I sent my card to Joanne.  I used the theme option of leaves for my card.


This leaf die and embossing folder came free with a recent card magazine. It took me a while but when I finally got round to using it I made several cards, so you have seen it before in a recent post. This time I cut the leaf from various colours of shiny card and then inlaid them. I dabbed distress ink on the embossing folder before embossing this piece of kraft paper. The sentiment is heat embossed on vellum.

Here is a close up:


I have been lucky enough to receive another beautiful card this month from the lovely Shylaa in India. she even designed the stamp set herself, how wonderful is that. I am afraid it got a bit bent in the post as it came all the way from India, but that hasn't stopped it being just beautiful.


http://picasion.com/
Thank you for taking the time to visit my blog today, I really appreciate it.
Hilary
xx

Tuesday, 22 October 2019

On a roll

Hello,
I am definitely on a roll with stencilling on patterned paper as I have yet another card to share using the technique. I am left wondering why I have never done it before!


As I have been busy making Christmas cards I have used the same stencil (by Uniko) as my previous post but this time I used Nuvo Glimmer Paste over some paid paper. I wasn't sure about it at first but it has actually grown on me. I managed to make 3 cards the same with one sheet. I decided to keep it simple by adding a strip to some mushroom coloured coated cardstock, I thought the colour matched the plaid nicely. To add a little more bling (Christmas cards have to have some bling in my book), interest and contrast I added a strip of red glitter card and finished the card off with a simple sentiment heat embossed in off white.

Here is a close up, can you see the bling?


I toyed with the idea of heat embossing the sentiment in red but I wanted to keep the understated look and just let the glitter shine.

Once the stencilling was done this was a really quick and easy card to make.

I am sharing this at:
Addicted to CAS #170 code word plaid
CAS Stencil - patterned paper, my third entry this month! Can't quite believe that.


 Thank you for taking the time to visit my blog today, I really appreciate it.
 Hilary xx

Sunday, 20 October 2019

Stencilling on patterned paper


Hello,
Today I have found time to share some more of my cards made with stencilling on patterned paper.


The patterned paper has Christmas words on it and is quite pale so it makes a good background. The stencil is from Uniko and I think the dove die is from x-cut. I have used cosmic shimmer texture paste over the stencil, it gives a lovely shine.


I am sharing these at:
CAS Stencil Challenge - patterned paper
Allsorts Challenge 542 - Add something gold and/or silver


Grab our logo

Here are a couple more using the same stencil with different paper:


Thank you for taking the time to visit my blog today, I really appreciate it.
Hilary
xx

Friday, 18 October 2019

Patterned Paper

Hello,
Today I am sharing a card I made for CAS Stencil October challenge. The theme this month is patterned paper. Although I have loads of patterned paper I am very bad at using it on my cards, so this month I am trying to change that.


I was busy making Christmas cards when I had the idea for this. The pp is cut from a large sheet of handmade paper that I bought from Paperchase (just because I loved it), but haven't used it for anything. It is now time to change that as I thought it would make a nice backdrop for some gold texture paste applied through 2 different stencils.


Normally when I use texture paste I make a huge mess and this card required some masking to achieve the look I wanted. I was pleased that I succeeded in placing the stencils and applying the paste without any mishap, it just meant being patient and letting the fronds dry completely before adding the butterflies.


I finished it with a simple sentiment heat embossed in black. I was on such a roll with patterned paper  that I have made several Christmas cards using the same technique. It is very satisfying when you try something new and it works, don't you think?

If I get time I will share the others in a day or 2.
Unser Logo zum Mitnehmen! / Our logo to take away!

I am also sharing this at day of the month card club, the theme this month is World Card Making Day. I have been following this challenge but haven't yet made an entry for it. I thought it was about time that changed.

Thank you for taking the time to visit my blog today, I really appreciate it.
Hilary
xx