Sunday 3 December 2023

We Love Stamping December Challenge

Today is the first Sunday of the month so time for a new challenge over at We Love Stamping

This month our theme is:

**Winter Flowers and Foliage**

I would like to welcome our guest designer Mari this month

I bought this stamp and die set from Tonic Studios sale in the January this year and promptly made 4 Christmas cards. I can tell you I was very pleased with myself. Of course that was the end of my Christmas card making until relatively recently. Anyway, as our December challenge is all about winter flowers I though it was the perfect time to share them. This one was stamped onto black watercolour paper and heat embossed with Wow gold pearl embossing powder. I them painted it with my Gansai Tambi gem colour paints (a Christmas present last year).


The image was cut with its matching die and mounted on a black panel that I had debossed with the Altenew dotted scales cover die. The panel was cut with the frame die that is part of the stamp and die set (Tonic Studios stamp club 12, Christmas rose). the sentiment and matching die are part of the same set. The panel was mounted onto some cream/gold pearlescent card. The insert is also pearlescent and stamped with the main image.


I really enjoyed making this, so went on to make 3 more:

This one was stamped in black and clear heat embossed

This was stamped in a pale ink and watercoloured

This one was heat embossed in metalline greengage Wow embossing powder

Which is your favourite?

Don't forget there is always a prize to be won and this month they are extra special. They are from AALL and Create and include a DL floral border stamp with pack of Sharp Tongues sentiments, an A5 stamp set and a pair of Miss Dee stamps. Why don't you head over to the challenge blog to check it out? The prize winner is selected randomly and in addition the DT will choose one entry to join us as a guest designer for a future challenge.

I hope I have inspired you to join us this month, all you have to do is ensure stamping (including digi) is the main focus on your card. It would be great if you could join in with our theme, but anythings goes is always an option if you are out of ideas. The challenge will close at noon (UK time) on Wednesday 29th December.

I am looking forward to seeing you in the gallery.

I am also sharing this at:
NBUS #57 - The stamp set is NBUS
Beautiful Blossoms #11 - Anything goes. I am sharing the pink one here


Thank you for taking the time to visit my blog today, I really appreciate it. 

Saturday 2 December 2023

November Card Chain Challenge Reveal

Today is 2nd of the month so time for the Card Chain Challenge big reveal. This month 32 card makers took part and I sent my card to Daja in Germany. I decided that I wanted to use my new hot foil plate by Spellbinders called you are my home, so I just used the layout from this months options.


I have also used some gold metallic patterned paper - feeling quite pleased about that as it doesn't make an appearance on my cards very often. I took a card base of kraft card and played about with the elements until I was happy. The house, hearts and sentiments are all hot foiled and I used some gold washi tape on the edge to finish it off. I am pleased about that too as I have a whole tin full of washi tape that rarely gets used. The house was lightly coloured with water based felt pens. The card insert was foiled with the second plate of a little village with the sun shining, that is part of the same set.


I am pleased to say that it was received in good time by Daja and she liked it. There is plenty of shine to offset the dull kraft base.


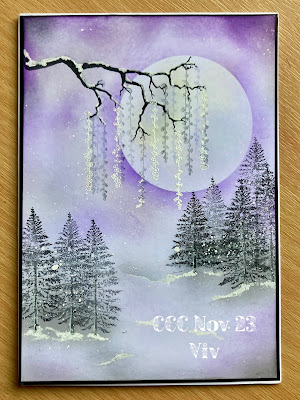
I was very lucky to receive this gorgeous card from Viv in UK. Viv has been practicing her scene creation skills with Lavinia stamps and is getting pretty expert at it if you ask me. I love this.


If you would like to take part in the next card chain challenge, you have until 6th to sign up here

Thank you for taking the time to visit my blog today, I really appreciate it. 

Saturday 18 November 2023

We Love Stamping November Reminder

Today is the 18th so time for a reminder for the current challenge over at We Love Stamping. The challenge where you can showcase your stamps and your skill at using them.

This month our theme is:

**Anything Stamped or Christmas Characters**
We would love to see all sorts of Christmas Characters, from Gnomes to Robins, Santa to Angels. 

Today I have some elves. I think these are the only elf stamps that I have and they are part of the same Woodware set that I used on my first card for this challenge.


My idea for this card came from the wonderful Therese Calvird . She shared a video (click the link on her name to see) on how to use small stamps. I really liked the look of the diecut circles arranged on a card, so I started out by making 9 circles but couldn't get them to look good when I arranged them on my card. Maybe because I am using a metric A6 card and she used an imperial A2 card. Anyway, in the end I settled for the line of 4. My stamp set has a total of 18 little images which include 4 little elves.

The card below is the one I made first. I foiled the background using an Altenew bebossing plate and glued down my elves and attached the sentiment. I didn't like it - the sentiment was wrong and the line of elves seemed to be missing something, so I made another - the one you see above, except I skipped the foiling on the background. Moving the sentiment and adding the ribbon helped. I pondered how to rescue the first one and decided to try the little twine bows. As luck would have it I had the right coloured twine for each circle (really not sure how that happened!). I then added little gold embellishments and it was done. I am pleased with it now, so much better, although the sentiment is still in the wrong place. The foiling does give it an extra lift though.


You can see the shine on the picture below.


I ended up making 4 of these. Thanks for the inspiration Therese.


I was originally going to heat emboss all the little characters, but decided that was a step too far as it would have been very time consuming.

Don't forget there is always a prize to be won and this month there are three prizes, two dies from Sizzix and stamp from Craft Stash  Why don't you head over to the challenge blog to check it out? The prize winner is selected randomly and in addition the DT will choose one entry to join us as a guest designer for a future challenge.

I hope I have inspired you to join us this month, all you have to do is ensure that there is some stamping (including digi) on your card. It would be great if you could join in with our theme, but anythings goes is always an option if you are out of ideas. The challenge will close at noon (UK time) on Wednesday 29th November.

I am looking forward to seeing you in the gallery.

Supplies:
Ink: Brusho powders; Catherine Pooler: deck the halls, glam, martini, cranberry fizz, flame; versamark
Stamps: Woodware JGS824 bubble large tops; Tonic Studios stamp club stamp and die set 12 Christmas rose
Dies: Nesting circle and scalloped edge

Thank you for taking the time to visit my blog today, I really appreciate it. 

Sunday 5 November 2023

We Love Stamping November Challenge

Today is the first Sunday of the month so time for a new challenge over at We Love Stamping. The challenge where you can showcase your stamps. This month we are introducing a change. Although we love stamping, with so many new products and techniques available to crafters we want to be more inclusive of different styles. So with immediate effect, we now require at least one stamped element on entries. Of course, as seasoned stampers, we will still love seeing fully stamped entries, but from now on your entry will be welcome as long as there is at least one stamped element on your card, regardless of whether it is the focal point or not.

This month our theme is:

**Anything Stamped or Christmas Characters**
We would love to see all sorts of Christmas Characters, from Gnomes to Robins, Santa to Angels. 


I started this by taking a piece of watercolour paper and stamping and clear heat embossing the wreath. I then spritzed it with water and shook some brusho powders onto the damp paper, lots of spritzing and mopping later I was happy with the look.


The little robin was stamped and heat embossed and his red breast coloured with a red pen. I mounted him onto another larger circle that I had coloured with the same ink (Catherine Pooler icing on the cake), finishing off with a few tiny gems.  The sentiment was also stamped and heat embossed.


Don't forget there is always a prize to be won and this month there are three prizes, two dies from Sizzix and stamp from Craft Stash  Why don't you head over to the challenge blog to check it out? The prize winner is selected randomly and in addition the DT will choose one entry to join us as a guest designer for a future challenge.

I hope I have inspired you to join us this month, all you have to do is ensure stamping (including digi) is the main focus on your card. It would be great if you could join in with our theme, but anythings goes is always an option if you are out of ideas. The challenge will close at noon (UK time) on Wednesday 29th November.

I am looking forward to seeing you in the gallery.

I am also sharing this at:
NBUS #56: the wreath and robin are NBUS


Supplies:
Ink: Brusho powders; Catherine Pooler icing on the cake; versamark
Stamps: Stamps by Chloe, leafy wreath; Woodware JGS824 bubble large tops; Tonic Studios stamp club stamp and die set 12 Christmas rose
Dies: Nesting circle and scalloped edge

Thank you for taking the time to visit my blog today, I really appreciate it. 

Thursday 2 November 2023

October Card Chain Challenge Reveal

Today is 2nd of the month so time for the Card Chain Challenge big reveal. This month 34 card makers took part and I sent my card to Gundi in Germany.

This month I used the theme options of bears and friendship and got my inspiration from 2 cards I found on Pinterest. This one for the background and this one for the design. Thanks Ellen and Hideko, pinterest is so helpful when your mind is blank.


I bought these bear stamps by Sunshine & Bee designs earlier this year as I have nothing like them in my stash. This is their first outing. I also bought a set with some cute koala bears, which are yet to be used.


I started by taking a piece of bristol smooth card and blended distress inks for the background. I added some white pigment ink through a circle stencil to add interest. I then took a piece of linen textured paper and cut the aperture and used a stitched rectangle to cut the panel to size. The bear was stamped, coloured with alcohol markers and fussy cut. I coloured round the white edges with a black marker and cut his arm so that he could poke out of the window. The flowers are diecuts coloured with alcohol markers.

I used some scrap card to cut 2 extra panels so I could get some dimension . I didn't want too much because it had to be posted to Germany. The sentiment is part of the same stamp set. I tried stamping it on vellum first as I thought it wouldn't work very well on the textured cardstock, but that didn't work well either so I stamped it directly on the card in the end.

Unfortunately this little bear took his time to reach Gundi in the forrest because customs decided to open the envelope. Perhaps they were unable to resist the little bear and flower on the envelope! Anyway, I am glad it arrived in the end.

I was very lucky to receive this gorgeous card from Brenda in UK. You can't really see on the photo, but the sentiments and wellies are silver heat embossed and they give the whole thing a lovely shine. I also love the 'straw' under the wellies - thanks Brenda.


I am also sharing tis at NBUS #56 - the stamps are NBUS


If you would like to take part in the next card chain challenge, you have until 6th to sign up here

Thank you for taking the time to visit my blog today, I really appreciate it. 

Monday 23 October 2023

Three cards and a bonus

Today I have three cards to share.

Card 1
I made this background panel while I was experimenting with different paint and ink after seeing the group of seven carmakers technique for October. I painted a sheet of watercolour paper with Gansai Tambi gem pink paint and then swiped the Spellbinders 3d embossing folder with Catherine Pooler apricot ink before embossing my panel. This embossing folder doesn't really have a flat side, but the debossed side is definitely flatter than the other side (see card 2). Anyway, I quite liked the look and the shine from the gem colour shows through the ink to give the background a subtle glow. Unfortunately I couldn't pick this up in my photos, so you will just have to believe me.

--

My flowers are from Pinkfresh, I have the hotfoil plate with matching stencils and dies. I love it and have used it several times already. The thank you sentiment is a hot foil plate by Spellbinders.


I want to share this at the Flower Challenge as they are celebrating their 7th birthday. I am so glad they are going to continue. Looking forward to the next 7 years.
The Flower Challenge #85 - Anything Goes


Card 2
This time I painted a piece of black watercolour card  with gem yellow gold and swiped black ink on the embossing folder before embossing the panel. This didn't really work because the ink went on the thin raised edges. I think it might have helped the definition of the embossing a little. It may not have worked as intended but it does have a wonderful shine in real life.


I added the baubles that were cut from snippets of gelli prints and backed them with glitter paper.


I am sharing this one at:
Christmas Kickstarter Day 8 - Let's play tic tac toe with Gail. I have used the left hand column die cut, glitter and embossing. I never knew Janis well but I did have the honour of receiving one of her cards as part of the card chain challenge in August 2020.
Snippets Playground #465 - My baubles and sentiment are cut from snippets.


Card 3
I made this cheery little card from some new dies I bought from Alex Syberia Designs, it is so hard to resist their generous 40% off sales.


I cut all the dies, and there are some very tiny pieces in this set, from white card and then coloured them with alcohol markers before arranging on a background that I blended with Distress Oxide inks. I highlighted the indentations with a sparkle gelly roll pen.


I eventually managed to get them arranged how I liked and used a combination of glue and foam tape to stick them down. I was very pleased with myself for not losing the tiny birds eye and the dot on the i.

I am sharing this one at:
The Divas that Cut Paper - Use a layer die set
NBUS #55 - The die set is NBUS


And finally here is a little bonus:

Thank you for taking the time to visit my blog today, I really appreciate it. 

Friday 20 October 2023

Getting Messy With Embossing Folders

Today I a set of Christmas cards to share that I made using the technique showcased by the group of seven cardmakers dry embossing with re-inker watercolouring, except I used brushos instead of re-inkers. I inked up 1 A4 piece of watercolour paper and make 6 cards from it - I was pleased with that.

Here they are:


I used versafine onyx black ink swiped directly onto the flat side of the embossing folder. It was very messy, but it worked. On the one below I swiped a second time and ran it through the machine, but I got a little shadow so I didn't do that again. It is not too obvious so I carried on with the panel. The sentiments are cut with glitter paper and stacked onto a black die cut to give a little shadow and help them stand out. The panels were then attached to coloured cardbases.


I used a different EF for the remainding A5 panel which was cut in half so I had 2 A6 panels. The EF is another 3d folder by Sizzix. I made them in exactly the same way but cut each embossed panel in half so I could make 4 cards. The panels were quite busy so I thought making them smaller help tone that down a bit, plus you can use these panels any way up unlike the trees above.


The black ink wasn't as intense as it could have been, but I son't mind that. When I used this technique before I used a black pen to fill in the background. That gives an intense colour, but takes ages. It also messed up the nib on my fineliner pen. I shan't be doing that again with my best pens.


I matted the panels onto some glitter paper and then a coloured cardbase.


Thanks to the group of seven cardmakers for all their inspiration. I am very pleased that I have been able to join the linky this month. I am ashamed to say that it is my first time.

I did make a few more cards but I experimented with different paints and inks. I will share them on a different post - hopefully!

I am sharing these at:
Group of Seven Carmakers - dry embossing with watercolour background


Thank you for taking the time to visit my blog today, I really appreciate it.