Monday 31 December 2018

Thanks

Hello,
Today I am sharing a thank you card at All sorts week 499/500 the theme is 'thanks a bunch' and requires a thank you or a focal flower. I think my card has both:


This is a unusual card for me to make and I have decided that I like it so will have to have a go at this sort of thing more often.

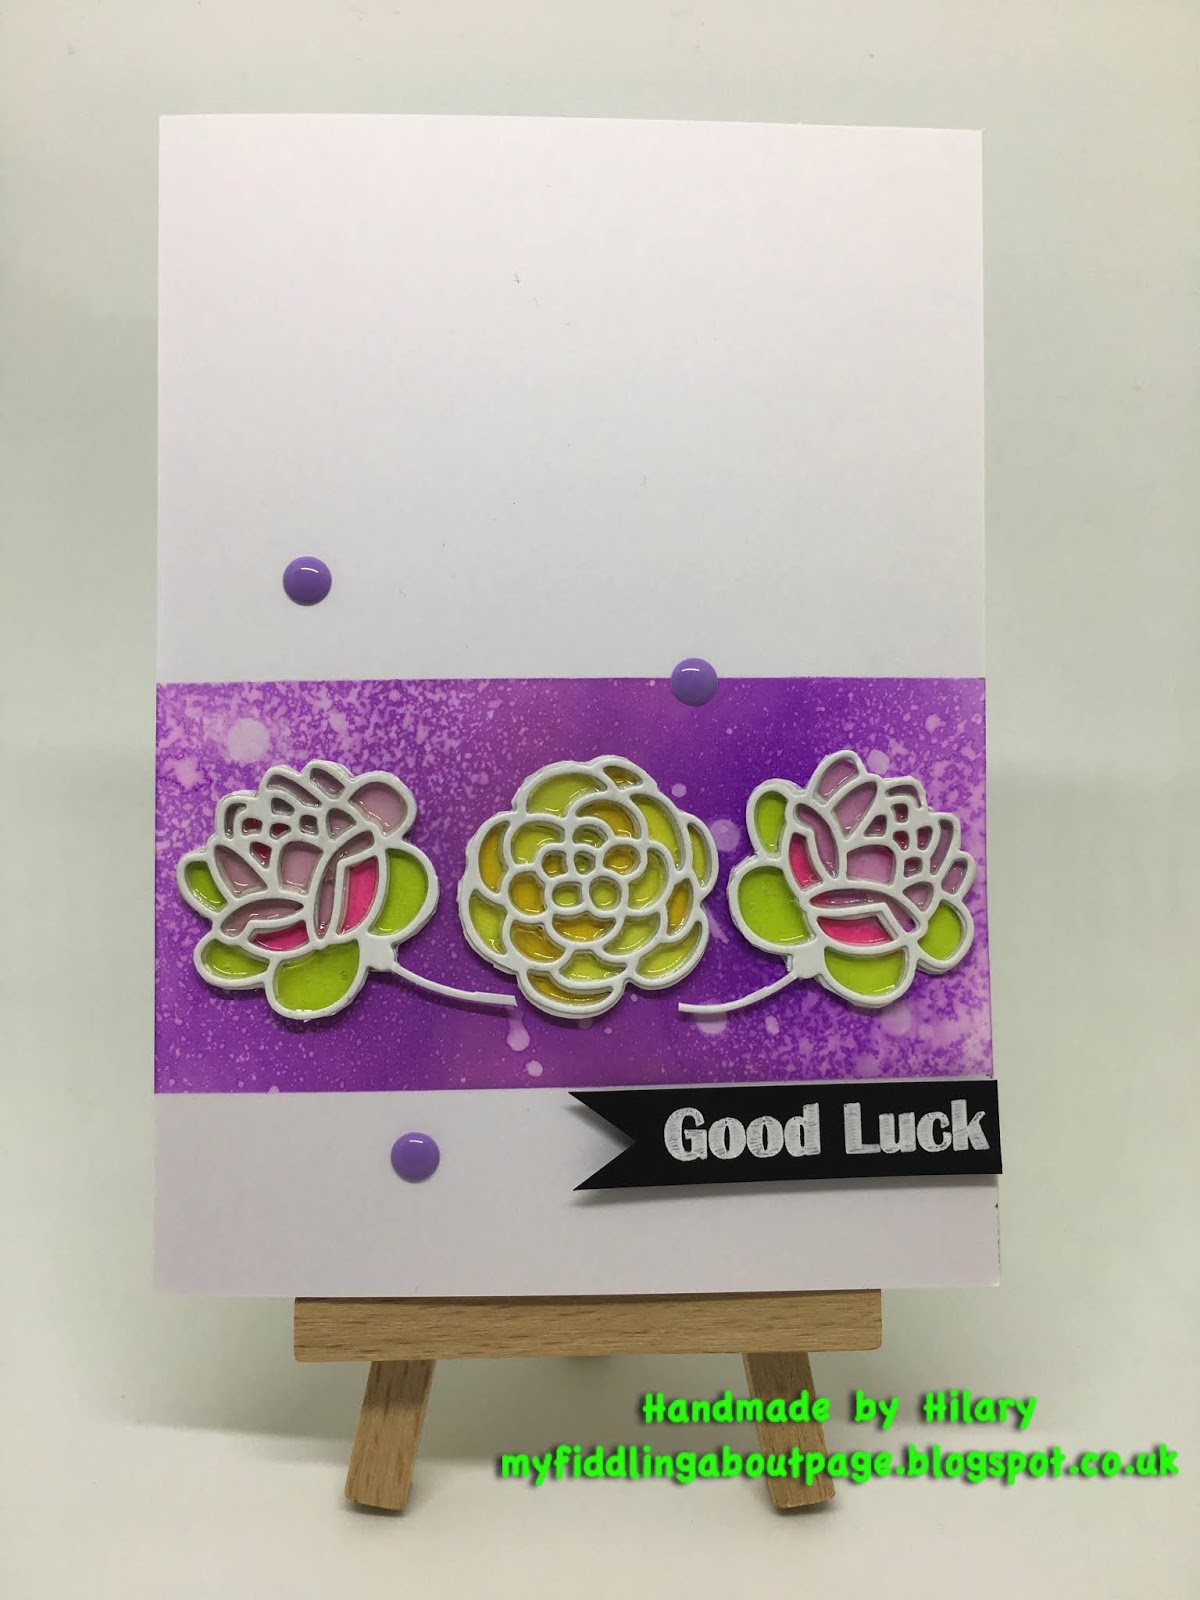
The background was smooched with Distress Oxide Inks and left to dry. The flowers are layered stamps from JustRite Clear, and the thanks die is from Create a Smile as is the scalloped frame die. I was so pleased to find someone that makes frame dies to fit A6 cards. I wrote the sentiment on velum with my Scan 'n Cut.


Thank you for taking the time to visit my blog today, I really appreciate it.
Hilary
xx

Saturday 22 December 2018

A Special Christmas Card

Hello,
Today I am sharing the Christmas card I made for my husband. As usual I got all my other cards done and then remembered I needed a special one for my special husband. I used a stamp and die set from Crafters Companion.

Here is my card:

The 2 stamps were stamped with versamark and heat embossed in silver. The die cut was cut from silver holographic card, I then cut an aperture with the outline die from the panel and the underlying card front. I covered the hole inside the card with some vellum and then drew in the string for the stamped bauble and fixed the string and bow for the special bauble with silver thread. Here is a close up:


The sentiment was also heat embossed. You may be wondering why I made the hole in the card and put vellum behind it, well this is why:


I put a battery operated tea that changes colour inside the card and the light shines through. I think it enhances the effect of the 'special' bauble. What do you think?


I am quite pleased with how this turned out and am sharing it at the following challenges:

1. Time Out #125 Inspired by words

2. CAS on Friday #148 Make a Christmas Card #2

3.AAA Cards CAS Game #130 3 of something

For your blog


My apologies for the slightly dark pictures.

Happy Christmas everyone.

Hilary
xx

Saturday 1 December 2018

November Card Chain Challenge

Hello,
Today I am sharing the card I made and sent to Helen in Ohio as part of the November card chain challenge, I chose the theme of deer for my card from the options found here.


The deer die is from Clarity Fresh Cut Dies, I cut it from my base card and then backed it with a piece of velum covered with a sheet of double sided adhesive. I then sprinkled a translucent glitter over the adhesive until the adhesive was fully covered with glitter. I cut the little red birds using my Scan n Cut and also wrote the sentiment with my Scan n Cut. Here is a close up:


The glitter really shines when the light catches it and the velum makes it translucent so light shines right through it. I was pleased with the clean and simple look and the contrast between the white and the red. I have made a batch of these for my Christmas cards just changing the message to Merry Christmas.

Badge Grab

Thank you for taking the time to visit my blog today, I really appreciate it. I would love to hear what you think about my cards.
Thank you
Hilary
xx

Monday 19 November 2018

Twofer Challenge #11


Hello,
Today I have two cards that I am entering in the Twofer Card Challenge #11 with the code word wreath.


Here are my cards:


The wreath stamp was free with a magazine I bought some time ago. The first card is my favourite.


I stamped and heat embossed the wreath in gold, I then used brusho paints all over and picked out detail in the flowers with my Zig clean colour real brush pens. I spritzed the whole thing with cosmic shimmer, heat embossed the sentiment with gold embossing powder and painted a strip on the top and bottom of the card base with a gold pen.

Here are a couple of photos that show the shimmer and detail better:


My second card was a bit more of an experiment but I am fairly pleased with how it turned out:


I decided to focus on the contrast between black and white. I heat embossed the wreath stamp in white several times. In my first attempt I tried colouring the flowers with metallic colouring pencils but it didn't really work so I started again and decided to highlight the wreath by using a while pencil. I used a white gel pen to fill the black areas with dots and heat embossed the sentiment in black. Here is a close up:

I quite like the way the black stands out in the wreath.

Thank you for taking the time to visit my blog today, I really appreciate it.
Hilary
xx

Sunday 18 November 2018

Clean and Simple


Hello,
Today I needed to make a quick card for my cousin who is going to have knee replacement surgery soon, I spotted the Freshly Made Sketches #363 and thought I would use it to help me create my card. I knew I wanted to make a blended ink panel (I am on a roll with these after winning my first challenge with one last week), so I used the sketch to dictate the layout. here is the sketch:


And here is my card:


I wanted to keep the colours vibrant so I went for reds and oranges (distress inks). I then die cut the panel from bright green mirror card and heat embossed the sentiment using black embossing powder. I seem to like shiny things these days!

Here is a close up:

I hope you like it.

Thank you for taking the time to visit my blog today, I really appreciate it.
Hilary
xx

Friday 2 November 2018

October Card Chain Challenge

Hello,
Today I am sharing my entry to the October Card Chain Challenge, I used the sketch option for my inspiration.

Here is my card:

I made the vibrant background with Catherine Pooler inks, I only have 4 colours so I used them all. I splashed the panel with a few drops of water just to give some interest, then I die cut the leaves from a watercolour panel that I made. The sentiment is stamped and heat embossed onto velum.


I sent this card to Norway and received a gorgeous CAS card from a fellow Brit. I am looking forward to taking part in the November challenge. It is so nice to receive cards from all over the world and to know that there are people just like me happily spending hours making cards.


Badge Grab


Thank you for taking the time to visit my blog today, I really appreciate it.
It would be wonderful if you left a message.
Thank you
Hilary
xx

One Layer card

Hello,
Today I am sharing a one layer card, I quite enjoy doing blended ink panels on cards, as long as I get them straight, so this technique is perfect for a one layer card. I also think they are ideal for stamping black solid images onto and now I have a stamping tool I can position them correctly and get a perfect solid black image. It always eluded me before that and I would end up getting out a black marker pen and trying to fill in the gaps, but it never quite worked. Anyway, here is my one layer card:


Orange and blue are one of my favourite colour combinations.


I am entering this in the following challenge:

Addicted to CAS #148 one layer


Thank you for taking the time to visit my blog today, I really appreciate it.
Thank you
Hilary
xx

Sunday 28 October 2018

Dimension

Hello,

Today I am sharing my card at:

 Less is More #383 Dimension.

Here is my card:


To make this card I masked off a panel and inked it with distress oxide wilted violet and spritzed it with water, I then die cut the flowers (Tutti Designs Rosy Corner), cut them out and stuck them to a sheet of card. After colouring them with my Spectrum Noir alcohol markers, I die cut several more flowers and stacked them on top of each other. Once they were dry I filled the spaces with glossy accents to create the shine effect. I positioned the flowers on the inked panel, and aded the sentiment panel and a few enamel dots. 

I think this technique is so effective and I really like the way it adds dimension to a simple card.


Thank you for taking the time to visit my blog today, I really appreciate it.
Hilary
xx

Flowers and Eyelets


Hello,
Today I am sharing a card at:
 Freshly Made Sketches #360

Here is my card:

The background is embossed, the sentiment is written on velum with my Scan n Cut, the wreath is die cut and the die cut flowers are attached with eyelets. I am quite pleased with the overall effect of this card. It looks quite detailed but is actually quite simple although fixing the layered flowers with the eyelets was a bit of a fiddle.


Thank you for taking the time to visit my blog today, I really appreciate it.
Hilary
xx

Sunday 7 October 2018

Vellum


Hello,
Today I am sharing a card at Just Add Ink Challenge #429 vellum, I was making a card for my sister's 60 birthday, but I thought it was lacking something. When I saw this weeks challenge at Just Add Ink I thought some vellum might do the trick. Here is my card:

The background is alcohol ink on yupo paper, which I quite liked but it was a bit intense. I didn't want to cover it up completely though, so I cut some vellum on my scan n cut to create the frame. I used the alcohol lift technique to stamp the flower and foliage at the base of the card. Here is a close up:


To make it special I cross stitched a butterfly on paper and attached it with foam pads:


The picture doesn't show it very well, but I stitched a few gold seed beads to the butterfly to create a link with the gold lettering. The cross stitch pattern came from the March 2015 edition of CrossStitcher magazine.

I hope you like it, but more importantly I hope my sister likes it. She will celebrate her birthday next week.


Thank you for taking the time to visit my blog today, I really appreciate it.

Hilary xx

Thursday 20 September 2018

September Card Chain Challenge

Hello,
Today I am sharing the card I made for the September Card Chain Challenge, from the four options I chose the sketch:


Here is my card:

 I used a stencil and clear glossy texture paste to get the stripe effect on the white panel (you can't see it particularly well in the photo) and mixed alcohol ink onto Yupo paper to create the effect in the circle. I added some foil while some of the ink was still sticky, I love this effect and it is so easy to do.


To finish it off I die cut a circle frame and stamped the sentiment. It went in the post to the USA and is now in the hands of the recipient.

Badge Grab
I enjoy doing this challenge as it is great to actually receive a special hand made card and it could come from anywhere in the world. The feedback is even more special when someone has the card in their hands. I think I will take part again.

Thank you for taking the time to visit my blog today.

Hilary xx

Monday 17 September 2018

Leaves

Hello,
Today I am entering the Twofer #9, prompt leaves. I have had a leaf die for a while that I bought at The Works and haven't used yet. I thought this was an opportunity to see what I could do with it. Both my cards are quite conventional but I really like the inlaid look you can achieve with dies so I have used it on both cards. I am happy with the end result even though I have used the same technique I think they are quite different.
I hope you like them:


For my first card the die cut is inlaid on a piece of craft card, the sentiment is heat embossed and the panel is raised on a piece of craft foam.


My second card took a bit longer, I made a watercolour panel and spritzed it with cosmic shimmer. I then cut the die from it and a piece of copper coloured mirror board and inlaid the pieces. I die cut the sentiment twice, once from the copper card and once from the watercolour background and then offset them to create the shadow effect. I toyed with the idea of putting on some sequins or similar embelishments, but resisted the urge.


Thank you for taking the time to visit my blog today, I really appreciate it.
Happy Crafting
Hilary
xx