Monday 23 October 2023

Three cards and a bonus

Today I have three cards to share.

Card 1
I made this background panel while I was experimenting with different paint and ink after seeing the group of seven carmakers technique for October. I painted a sheet of watercolour paper with Gansai Tambi gem pink paint and then swiped the Spellbinders 3d embossing folder with Catherine Pooler apricot ink before embossing my panel. This embossing folder doesn't really have a flat side, but the debossed side is definitely flatter than the other side (see card 2). Anyway, I quite liked the look and the shine from the gem colour shows through the ink to give the background a subtle glow. Unfortunately I couldn't pick this up in my photos, so you will just have to believe me.

--

My flowers are from Pinkfresh, I have the hotfoil plate with matching stencils and dies. I love it and have used it several times already. The thank you sentiment is a hot foil plate by Spellbinders.


I want to share this at the Flower Challenge as they are celebrating their 7th birthday. I am so glad they are going to continue. Looking forward to the next 7 years.
The Flower Challenge #85 - Anything Goes


Card 2
This time I painted a piece of black watercolour card  with gem yellow gold and swiped black ink on the embossing folder before embossing the panel. This didn't really work because the ink went on the thin raised edges. I think it might have helped the definition of the embossing a little. It may not have worked as intended but it does have a wonderful shine in real life.


I added the baubles that were cut from snippets of gelli prints and backed them with glitter paper.


I am sharing this one at:
Christmas Kickstarter Day 8 - Let's play tic tac toe with Gail. I have used the left hand column die cut, glitter and embossing. I never knew Janis well but I did have the honour of receiving one of her cards as part of the card chain challenge in August 2020.
Snippets Playground #465 - My baubles and sentiment are cut from snippets.


Card 3
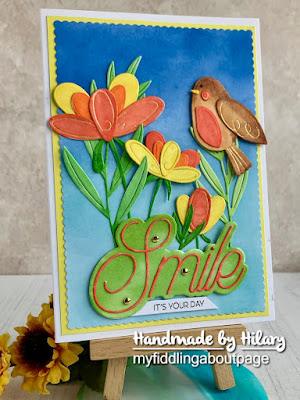
I made this cheery little card from some new dies I bought from Alex Syberia Designs, it is so hard to resist their generous 40% off sales.


I cut all the dies, and there are some very tiny pieces in this set, from white card and then coloured them with alcohol markers before arranging on a background that I blended with Distress Oxide inks. I highlighted the indentations with a sparkle gelly roll pen.


I eventually managed to get them arranged how I liked and used a combination of glue and foam tape to stick them down. I was very pleased with myself for not losing the tiny birds eye and the dot on the i.

I am sharing this one at:
The Divas that Cut Paper - Use a layer die set
NBUS #55 - The die set is NBUS


And finally here is a little bonus:

Thank you for taking the time to visit my blog today, I really appreciate it. 

Friday 20 October 2023

Getting Messy With Embossing Folders

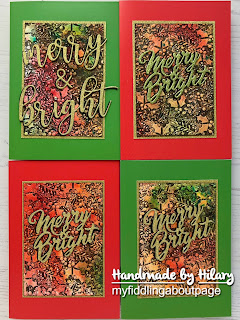
Today I a set of Christmas cards to share that I made using the technique showcased by the group of seven cardmakers dry embossing with re-inker watercolouring, except I used brushos instead of re-inkers. I inked up 1 A4 piece of watercolour paper and make 6 cards from it - I was pleased with that.

Here they are:


I used versafine onyx black ink swiped directly onto the flat side of the embossing folder. It was very messy, but it worked. On the one below I swiped a second time and ran it through the machine, but I got a little shadow so I didn't do that again. It is not too obvious so I carried on with the panel. The sentiments are cut with glitter paper and stacked onto a black die cut to give a little shadow and help them stand out. The panels were then attached to coloured cardbases.


I used a different EF for the remainding A5 panel which was cut in half so I had 2 A6 panels. The EF is another 3d folder by Sizzix. I made them in exactly the same way but cut each embossed panel in half so I could make 4 cards. The panels were quite busy so I thought making them smaller help tone that down a bit, plus you can use these panels any way up unlike the trees above.


The black ink wasn't as intense as it could have been, but I son't mind that. When I used this technique before I used a black pen to fill in the background. That gives an intense colour, but takes ages. It also messed up the nib on my fineliner pen. I shan't be doing that again with my best pens.


I matted the panels onto some glitter paper and then a coloured cardbase.


Thanks to the group of seven cardmakers for all their inspiration. I am very pleased that I have been able to join the linky this month. I am ashamed to say that it is my first time.

I did make a few more cards but I experimented with different paints and inks. I will share them on a different post - hopefully!

I am sharing these at:
Group of Seven Carmakers - dry embossing with watercolour background


Thank you for taking the time to visit my blog today, I really appreciate it. 

Wednesday 18 October 2023

We Love Stamping October Reminder

Today is the 18th so time for a reminder for the current challenge over at We Love Stamping. The challenge where you can showcase your stamps. We will be announcing some challenge changes soon, so please make a note to check the challenge post on 5th November.

This month our theme is:

** Mood Board **
Here is what I made:

And here is the mood board. I hope you can see where I got my inspiration from:


I have used a digi stamp this month. I think that is a first for me, for this challenge anyway. I found the stamp and colouring instructions from Lindsey Weirich otherwise known as the frugal crafter. I printed the flower and followed her instructions for colouring with alcohol markers.


The colouring was surprisingly easy, but the fussy cutting was another matter. I went over the edges with a black marker to camouflage the edges and mounted it with foam tape onto a glossy black background that I had die cut with an Altenew debossing cover die. The sentiment is heat embossed on black card. Sorry it looks grey in the photos. I stacked it onto two, slightly offset, white die cuts that give the shadow, in order to help it pop. I should really have used the same glossy black card as the background, but I had the matt one already made and was too lazy to get by foiling machine out!


The panel was attached to an orange cardbase and a few sequins finished it off.

Don't forget there is always a prize to be won and this month the prize is Stamperia Alice collection stamps, stickers and DP pad. Why don't you head over to the challenge blog to check it out? The prize winner is selected randomly and in addition the DT will choose one entry to join us as a guest designer for a future challenge.

I hope I have inspired you to join us this month, all you have to do is ensure stamping (including digi) is the main focus on your card. It would be great if you could join in with our theme, but anythings goes is always an option if you are out of ideas. The challenge will close at noon (UK time) on Wednesday 25th October.

I am looking forward to seeing you in the gallery.

I am also sharing this at:


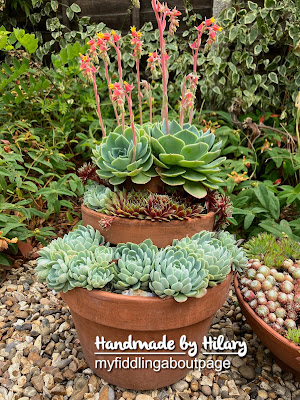
Finally here are a couple of pictures from my garden taken a couple of days ago. The plants you can see are mainly aeoniums. I have moved them all to be close to the house for some protection against the cold nights we have recently had. I don't want to bring them in yet as it is still a bit early. Here they are enjoying the sunshine.


The one in the corner stays out all winter as I don't have enough room inside. It has been out for 2 winters now and although it lost a few heads to frost last winter the plants survived. I think there are about 3 plants in the pot.


Thank you for taking the time to visit my blog today, I really appreciate it. 

Saturday 14 October 2023

Allsorts Week 750

It's Saturday morning so time for another challenge over at Allsorts. Today I am joining the wonderful DT team where the theme this week is to add texture. Thank you for inviting me to join you again for week 750.

My texture comes from a 3d embossing folder and some glass beads texture paste that I have used on the Christmas tree.


I embossed a piece of kraft card with this Sizzix 3d embossing folder and then highlighted elements with a white gel pen. I used the matching die for the Christmas tree stamp that you can see on the insert and envelope, and cut it from an old gelli print that was green and gold. That was spread with the glass bead gel and left to dry - it took a long time.


I have a range of tiny star dies so I used them to cut the stars from red metallic card and decorated the tree with them. On searching my stash I discovered that I am out of gold card so I put double sided tape around the edge of my panel and used gilding flakes to provide the gold edge. They also add a little bit of texture too.


The sentiment was stamped and heat embossed onto kraft card and cut with the matching die.

The glass beads really shine in the light. I hope you will find time to join the add texture challenge this week at Allsorts, but if texture isn't your think anything goes is always an option.

Supplies:
Cardstock: Kraft
Ink: White gel pen; White pigment ink; Versamark
Stamps: Tonic Studios stamp club 12 Christmas rose; My Favourite Things starry Christmas
Dies: Matching dies
Other: Galeria glass bead texture gel; Sizzix 3d embossing folder; Gilding flakes

Thank you for taking the time to visit my blog today, I really appreciate it. 

Monday 2 October 2023

September Card Chain Challenge Reveal

Today is 2nd of the month so time for the September Card Chain Challenge big reveal, 29
card makers took part and I sent my card to Tina in Slovenia.

This month I have used the theme options of Autumn and Friendship and the technique option of Foil.


I bought this spellbinders autumn leaf border hotfoil plate in the spellbinders sale an few weeks ago and this is the first card I have made with it. I used iridescent gold foil onto smooth white cardstock and then coloured the image with my polychromos pencils - I was quite pleased with the result. I hope my leaves look suitably autumnal.


I cut my panel with a scalloped edge die and decided that I had to do something about all the white space. Hence my attempt at splatters. I am terrified of splatters and feel that I haven't mastered them yet. Firstly,  I took three acrylic paint pens in different colours (green, orange and yellow) and splattered away. The resulting splatters were very fine and the different colours didn't show up very well so I had another go with some gold calligraphy ink. These splatters were a bit more visible, but still very fine. Anyway I left it there as I thought I was about to ruin it.


My next conundrum was where to place my sentiment, which was foiled in a different gold and stacked for dimension. In the end I just placed it in the middle as it just didn't look right anywhere else. I rarely make landscape cards, mainly because I can never get them to stand up properly. To add interest to the insert, I used the foil plate to emboss a piece of smooth watercolour paper. I tried using thinner paper but it just cracked. I lightly inked the embossing, trimmed the panel and attached it to a pale yellow insert.

I was very lucky to receive this gorgeous card from Dagmara in Poland. I love the colours on this one and the background has a lovely shimmer to it. The card is sitting on my shelf and that little fox just keeps staring at me! Anyway, I love it. Thanks Dagmara. She tells me that the sentiment means 'empires fall, friendship endures'.

If you would like to take part in the next card chain challenge, you have until 6th to sign up here.

Yesterday I said I would share some of the photos of the succulent displays that I came across at RHS Wisley on Thursday. I have been growing succulents for a number of years so I am always interested in seeing new displays and getting ideas. I wasn't disappointed.

This display is in a large terracotta pot and those plants are quite large, each one about the size of my hand.

They are doing a trial of Aeoniums with the intention of awarding some an award of garden merit (AGM). You can see about a third of them in this picture.

This is one of about 10 displays that were sat on the tables on the roof terrace of the Hilltop centre.
I love them all.

And finally here is one of my own displays.


Thank you for taking the time to visit my blog today, I really appreciate it. 

Sunday 1 October 2023

We Love Stamping October Challenge

Today is the first Sunday of the month so time for a new challenge over at We Love Stamping. The challenge where you can showcase your stamps and your skill at using them.

This month our theme is:

** Mood Board or Anything Stamping Goes **


Our guest designer this month is the wonderful Carole from crafty stamper. I hope you get a chance to pay her a visit. A visit to Carol is always worth while.

A few months ago I bought this Robin stamp by IndigoBlu so when I saw the mood board I decided it must to time to ink it up. I chose to stamp it onto some Strathmore vellum paper that has a little bit of texture and decided that I would use my Polychromos pencils to colour it.


When the colouring was all done I put the image back in my misti and re stamped it with versamark and clear heat embossed it. Unfortunately you can't see that in the photos but it does give a little bit of shine and a nice finish to it.


When I started out I wasn't sure how I was going to finish the background. In the end I chose to give my robin a bit of a halo with the yellow pencil and then I used a mixture of all the colours to fill up the remaining space. I quite like the texture that the vellum card gives to the finished look. What do you think?

I thought the fruit on the tree looked like apples so I coloured them as apples, but then realised that they would be really very very small ones as Robins are such small birds. Too late to do anything about it, but I really don't know what else they could be and will therefore just call it artistic license!

The sentiment is a foil plate and matching die from Spellbinders.

Don't forget there is always a prize to be won and this month the prize is donated by Craft Stash and consists of Stamperia Alice collection stamps, stickers and DP pad, a Woodware Poinsettia stamp and a Stampendous House Mouse stamp. Why don't you head over to the challenge blog to check it out? The prize winner is selected randomly and in addition the DT will choose one entry to join us as a guest designer for a future challenge.

I hope I have inspired you to join us this month, all you have to do is ensure stamping (including digi) is the main focus on your card. It would be great if you could join in with our theme, but anythings goes is always an option if you are out of ideas. The challenge will close at noon (UK time) on Wednesday 25th October.

I am looking forward to seeing you in the gallery.

I was lucky enough to make a visit to RHS Wisley this week so I have some photos to share. There was still lots of colour to see from the roses and dahlias amongst others. Tomorrow I will share some pictures of the succulents they have. I am always pleased to see succulents and compare them with how mine look.

Did you spot the bee?

So many dahlias, I restricted myself to showing you just 2.

Such an amazing colour

28th September and still in full flower.

Thank you for taking the time to visit my blog today, I really appreciate it.